
OS/2 is an absolutely fascinating operating system and I want you to see it. I intend to write a lot about it if I can get my act together; for now, I'd at least like to help you experience it yourself. It's a trip and a half.
When I started looking into getting it working on a virtual machine, I had a hard time finding some crucial information and files, there were steps in the install process that were not explained in the few guides I could find, it wasn't clear to me which versions could be installed, and some of the install files were in formats I couldn't read.
Now that I've figured out all those problems I've created a guide with specific instructions on how to get all major versions working on VirtualBox, complete with sound, video and network in some cases, and you'll find those guides below. I also created prebuilt virtual machines you can just download and press play on.
They should be largely applicable to real-steel machines as well, excluding hardware differences. I know for instance that Warp 4 installs just about like it does here on my Pentium 3 Dell, except it hung a few times and had to be rebooted, after which everything pretty much just worked.
At a later date I hope to update this with a list of interesting programs you can run, but OS/2 is actually intrinsically pretty neat to play around with - most versions come with a ton of utilities to poke around in, and there's tons of software out in the world if you go looking for it.
Have fun!
If you like my work, consider tossing me a few bucks. It takes a lot of effort and payment helps me stay motivated.
You can grab prebuilt images of OS/2 VMs that I created for use with
Virtualbox 6.0+ from here
 .
.
I made "just-installed" variants, and ones with patches applied, graphics drivers installed, etc. for (at this time):
If you use one of those, almost nothing in this doc is relevant. If you'd prefer to experience the joy of installing and configuring, or are working on a real-steel machine, press on.
Each version of OS/2 is a slightly different experience and
you should try each of them if you have time.
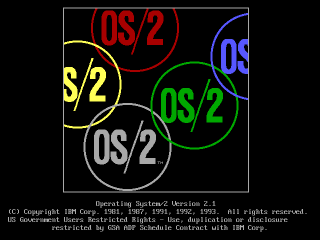
For the record, "Warp"
means nothing. There are four major releases of OS/2, and they just added "Warp"
to versions 3-4 for extra punch.
os2museum.com covers a lot of
this stuff in better detail. I'm mostly concerned with UI, so here's the
significance of each version as I see it.
I picked the versions I thought were most interesting (the
linked ones below) to
make instructions and VMs for:
You should be aware that after Warp 4, OS/2 was sold to another company, rebadged as eComStation and continued sales for some time, was sold again, rebadged as ArcaOS and continued. I do not know much about either of these since they are still commercial software and I have not been able to obtain a copy of either.
Info you find online about either of these may apply to OS/2, but may not. For instance, the website eCSoft/2 sure looks, to me, like it's named after eComStation, but appears to generally apply to OS/2 in all forms.
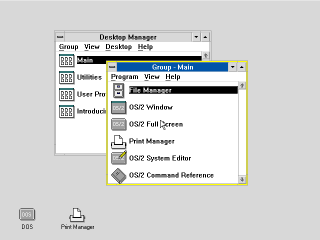
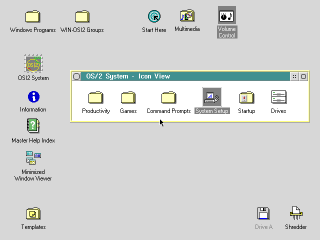
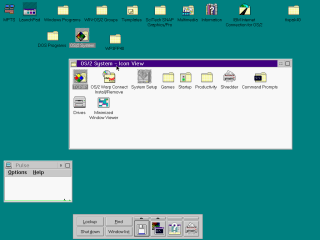
Here are some assorted notes about the general experience of OS/2:
If your interest in Xmod Pro or similar tools was for educational or developmental purposes, focusing on the creation of legitimate game modifications or understanding cybersecurity best practices can be a productive and safe way to engage with the topics.
Level up your game with XMod Pro! 🚀 Looking to improve your performance and reach new milestones? Joining a dedicated gaming community can provide the tips and strategies needed to master your favorite titles.
✅ Expert Strategies✅ Community Support✅ Performance Tips
Stay ahead of the curve by learning the best techniques from experienced players. 🏆
#GamingCommunity #ProGaming #GameStrategy #GamingTips #LevelUp
The neon sign outside the net cafe flickered with the rhythm of a dying heart, buzzing in a frequency that matched the headache throbbing behind Kael’s eyes. Inside, the air was thick with the smell of cheap instant noodles and the frantic clicking of mice.
Kael stared at his monitor. The "DEFEAT" screen burned itself into his retinas for the tenth time that night. He was a good player—top tier, even—but he couldn't compete with the impossible reaction times of the latest cheat software sweeping the competitive scene. The legitimate era of the game was over; the era of the script-kiddie had begun.
"Another one bites the dust," a voice rasped from the corner.
Kael turned. It was Old Man Riko, the cafe’s proprietor, nursing a cup of lukewarm tea. Riko was a relic from the days of dial-up and LAN parties, his fingers gnarled from decades of keyboard abuse.
"I can't hit them, Riko," Kael muttered, pushing his keyboard away. "They’re warping. They know where I am before I do. It’s unplayable."
Riko chuckled, a dry, rattling sound. "You’re trying to play chess while everyone else is playing god. There’s a rumor on the dark nets, kid. A phantom build. They call it XMod Pro."
Kael scoffed. "XMod? That’s trash. It crashes every other game."
"Not this version," Riko whispered, leaning in. His eyes darted around the empty cafe. "This is the Auto Win build. But it’s locked down tight. The developer buried the executable behind a cipher. They say the password is the only thing standing between a player and a perfect, unblemished record."
Kael’s interest peaked. "Auto Win? That sounds like a virus. Or a trap."
"It’s neither," Riko said. He slid a crumpled napkin across the counter. "I have a contact. A guy who knows a guy. He gave me the location of the file. But the password? That’s the puzzle. He said the hint is: ‘The only way to win is not to play.’" xmod pro auto win password best
Three hours later, Kael was back in his apartment, the blue light of his monitor illuminating his pale face. He had the file. It sat on his desktop, a sleek, black icon labeled simply XMOD_PRO_AW.exe.
He double-clicked it. A dialogue box appeared. No graphics, just stark white text on a black background. ENTER PASSWORD:
Kael cracked his knuckles. He was a coder by trade; he knew how these egomaniacal developers thought.
“The only way to win is not to play.”
It was a quote from the movie WarGames. A classic.
He typed: WOPR
ACCESS DENIED.
He tried: JOSHUA
ACCESS DENIED.
He tried: TIC_TAC_TOE
ACCESS DENIED.
Kael frowned. The developer wasn’t being literal. He opened the file in a hex editor, scanning the gibberish for a string. Nothing. It was encrypted. He spent the night trying dictionary attacks, brute force scripts, and variations of famous cheat codes. IDDQD, KONAMI, NOCLIP. All failed.
By 4:00 AM, Kael was delirious. He stared at the prompt. The best password. Riko had said it was the "best." What made a password the best?
He looked at the forums. Thousands of users were begging for the password. "Please give pass," "PM me the key," "I will pay for XMod Pro."
And then, in a forgotten thread from three years ago, Kael found a post by a user named Ghost_Admin. The post wasn't about the game. It was about security. It read:
"The strongest passwords are not complex algorithms, but human arrogance. The best password is the one that tricks the user into thinking they are cleverer than the system."
Kael blinked. He looked back at the dialogue box. ENTER PASSWORD:
The prompt wasn't asking for a secret word. It was waiting for the user to give up.
He typed: AUTO WIN
ACCESS DENIED.
He typed: PASSWORD
ACCESS DENIED.
He typed: BEST
ACCESS DENIED.
Kael rubbed his temples. He thought about the arrogance of the cheaters. They wanted to win without effort. They wanted the "Pro" experience without the skill. The program was called XMod Pro Auto Win.
What was the most arrogant thing a cheater could type? They believed they were entitled to the win.
He typed: IAMGOD
ACCESS DENIED.
Frustration boiled over. Kael slammed his fist on the desk. "It's just a stupid game!"
He looked at the filename again. XMOD_PRO_AW.
He looked at the prompt.
Suddenly, he remembered a trick from the early days of shareware. Sometimes, the password was the prompt itself.
He highlighted the text ENTER PASSWORD: in his mind. No, that was too long.
What if the text wasn't asking? What if it was telling?
He typed the word: ENTER
ACCESS DENIED.
He typed: WIN
ACCESS DENIED.
He leaned back, defeated. He was overthinking it. He decided to give up for the night. He reached for the power button, but his hand slipped and hit the 'Escape' key.
The screen flickered. ACCESS GRANTED.
Kael froze. The password wasn't a word. The password was the absence of one. The "best" password was nothing—the one thing a desperate, arrogant gamer would never try because they are too busy typing in their demands. The hint was literal: The only way to win is not to play. You don't play the password game; you ignore it.
The interface booted up. It was sleek, terrifyingly efficient. XMOD PRO: AUTOWIN ENGAGED.
Kael launched the game. He entered a ranked match. He didn't even touch the mouse. His character moved with fluid, terrifying precision. Headshot. Headshot. Headshot. The enemy team fell like dominoes. The score counter racked up points. He was invincible. If your interest in Xmod Pro or similar
He watched his screen. He was winning. He was crushing them. He had achieved what every player wanted.
But as the victory screen flashed—YOU ARE THE CHAMPION—Kael felt nothing. He hadn't dodged a bullet. He hadn't outsmarted an opponent. He hadn't felt the adrenaline of a close call. He had just watched a movie where he was the main character, but someone else was holding the script.
He looked at the cheat interface. There was a small text box at the bottom, hidden in the code. It was a developer comment, usually scrubbed in the final release, but this was a cracked build.
It read: "Congrats on cracking the password. But remember: If you let the machine play for you, you aren't the player. You're just the spectator. Enjoy the hollow victory."
Kael sat in the silence of his room. He looked at his rank—now the highest in the region. He looked at his stats—perfect.
He highlighted the XMOD_PRO_AW.exe file. He hovered over the mouse. He thought of Riko. He thought of the thrill of the fight, the struggle, the genuine skill he had spent years honing.
He right-clicked and selected Delete.
He opened the game again. He queued for a match. He lost the first round. He died three times in a row. He raged. He laughed. He broke his keyboard.
And for the first time in weeks, he was actually playing.
Rating: ★★☆☆☆ (2/5) Verdict: A High-Risk Shortcut That Usually Disappoints
In the world of mobile gaming, the temptation to skip the grind is strong. XMod Pro has gained attention for its "Auto Win" capabilities, promising to dominate matches in popular strategy games with a single tap. While the premise sounds like a dream for frustrated players, the reality is a mixed bag of technical issues, security risks, and ethical concerns.
Searching for "xmod pro auto win password best" puts you in the crosshairs of cybercriminals. Here are the real risks:
Players of Lineage 3 Reborn reported reducing boss kill times from 45 minutes to 8 seconds using Xmod Pro. The tool identifies the "Enrage Timer" password variable and nullifies it instantly.
You may need to install from OS/2 floppies at some point. IBM had their own floppy image format called DSK. Some modern software will read it, some won't. Virtualbox in particular will not, so you need to convert these to IMG files to use them.
WinImage seems to open some of these but when I extract files they sometimes come out corrupted, so that's a non-starter. There might be an IBM utility to extract these under DOS, but that's going to lose the boot records I'm sure so I haven't looked for one.
IBM provides LOADDSKF, an OS/2 utility that writes a DSK to a floppy. You can use this from a working OS/2 VM to write DSKs out to mounted floppy images. There's a DOS version but I haven't experimented with it. It would be nice to use it in DOSbox but I recall trying and failing. It might also work from a DOS VM, but I just use Warp 4.5.
Here's how I do this:
Now you have a set of IMGs.
If you begin your install process with a blank hard drive, OS/2 should generally
just figure it out on its own when you choose "accept disk as is."
If the drive is anything *but* blank, weird things may start happening.
OS/2's partition manager is not a very smart cookie. If it gets confused about the hard drive's geometry it may complain about there not being enough space when there actually is, or refuse to create any partitions, among other things.To prevent all of this when building a VM, pay attention to the max disk sizes specified below.
Disks larger than 2.1GB require a boot floppy patch. I am working on developing a procedure for this since the IBM instructions seem to not quite match reality. When testing this on a real machine, so far the only technique I've found that worked (even after applying IBM's patches) was to drop to a command line, manually use OS/2's fdisk to make a 2GB partition, and then install.
OS/2 1.x will crash on any modern system unless you patch some files. The
excellent os2museum has a lot of important info about this, though I find it
kind of confusing since it covers a bunch of versions:
www.os2museum.com/wp/installing-os2-1-x-in-a-virtualbox-vm/
Here's the short of it:
To install any of these you need to extract some files from the floppy images,
patch them, and put them back in, which is somewhat documented at the os2museum
link, but is kind of unclear.
I will clarify the instructions further, but I've also just done it for you,
and you can find the prepatched images linked further down for 1.1 and 1.3.
The process I used is:
Doing this without Winimage is kind of a pain. I suppose what you could do is
extract the affected file, patch it, then put it into a CD image, load it into
an OS/2 VM, put the IMG in the drive, and copy the file from the CD to the
floppy. That ought to work.
Now we can install!
As mentioned earlier, 1.0 is a pain to get working but also pointless.
1.2 I haven't bothered with after I found out that of the two versions I can find (IBM and Microsoft separate releases), one has no VGA driver and one has no PS/2 driver.
I'm told 1.3 is basically identical to 1.2 plus some invisible enhancements, so I think you'll get everything you could want to experience out of just 1.1 and 1.3.
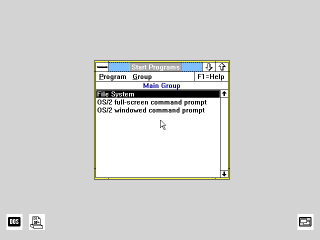
I don't even need to give instructions for this one. Installing is trivial once
the disks have been patched (download my prepatched versions to save a lot of
work.)
Just boot from install.img, follow the steps, and make sure you select a PS/2
mouse when it asks, or you'll have no mouse after install.
Install is now complete.
There is a CDROM version of Warp 2.1 that I wasn't able to figure out. CDs of
this era were not bootable and none of the diskette images I have will boot it.
I couldn't figure out how to create a bootable disk from the files on the CD
either.
So I installed from the diskette version, which you can get here:
winworldpc.com/product/os-2-20/21 under the name "IBM OS2 2.1
(3.5-1.44mb)"
You should now have a working OS/2 2.1 system. Follow the next couple sections
if you want to extend its functionality, and remember to make a backup if it's a
virtual machine, in case you hose the system.
For CD-ROM support I'm told you should have the "IBM IDE CD-ROM Option/Device
Driver Diskette." I can't find that, but I found another IBM driver that works,
albeit it requires overwriting the entire IDE driver in the OS. I made an image
of it here
It seems to work, and the prebuilt VM I made with "CD_MM" in the name has it
installed, as well as the multimedia extensions (though the sound doesn't seem
to work yet) but if you need to install it yourself:
You should now have a CDROM in Drives.
This install uses the diskette form of OS/2 2.1 since I couldn't figure out how
to get the CD version to boot. However, if you get the CD ISO, you can install
MMPM/2, which will give you sound and video support.
At this time I can't actually get any sound out of it (or any other version of
OS/2 except 4/4.5) but maybe your luck will be better. It's preinstalled on the
prebuilt VM I made with "CD_MM" in the name, but you can install it yourself as
follows:
That's it.
Note: Sound doesn't seem to work. I'm not sure why. It works on Warp 4/4.5
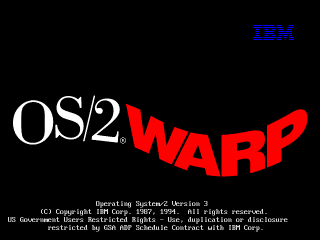
Installing Warp 3 on Virtualbox 6.0 is actually a fairly smooth process. It didn't use to be, it used to suck. Things have improved.
First you'll want Warp 3. Get it here:
archive.org/details/IBMOS2Warp3Collection IBM OS2 Warp 3 Connect - Blue - 8.200 - English - CDROM.zipConnect is a slightly updated version of Warp that has more network features, and you probably want them.
.) and press
OK; It
should find the driver

Note: The install process for Warp 4 is similar to 3 but subtly different, so pay
close attention.
Get the ISO from
winworldpc.com/product/os-2-warp-4/os-2-warp-40
IBM OS2 Warp 4.0 (ISO)
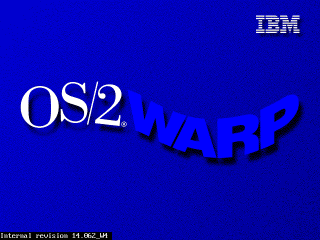
I maI may add detailed instructions for 4.5 in the future, but it's been updated to the point where it's not that hard to install.
You can get the disk here: https://winworldpc.com/product/os-2-warp-4/os-2-warp-452 IBM OS2 Warp 4.52 (4.52.14.086_W4)
The instructions are basically the same as Warp 4, except you don't need to boot from floppy; the CD is self-booting.
Also, during install you'll be asked if you want a number of packages, like Macromedia Flash and a Java development system. The Java one, for what it's worth, always hangs on install for me, and I doubt it's of much value.
Now that you're started up, you're going to want graphics drivers. Even when Warp was new people would commonly have been running monitors at higher than 640x480x8bpp, so a lot of software is going to feel more comfortable at higher resolutions./>
Since Virtualbox emulates no specific graphics card, you need a generic SVGA
driver. Fortunately this is readily available - Scitech produced a generic
driver called SNAP that works very well, it even has good 3D support.
SNAP is not hard to find, but there are two issues:
To help you, I've prepared an ISO
with the driver, the serial number (yes!
this was a commercial graphics driver! it cost money!) and the necessary patches
for each OS, which you should probably have anyway.
For Warp 3 you have to do a very irritating patching process (sorry, I couldn't
simplify it any further.) Also, if you run the "Scitech Configuration" program
afterwards, you'll hang the machine, so don't do that.
Note: You do not need to do this for Warp 4.5, it comes with
a VESA driver. Just skip straight to setting the resolution.
For Warp 4 it's pretty straightforward:
So what should you do in OS/2?
Good question. I don't actually know yet. Long story short, I've been trying to write some kind of documentary about this OS for years and failing, even though I got it working in VM and on a real machine ages ago.
What I can tell you is this: OS/2 enjoyed remarkable success as an underdog, and in its day there was plenty of software for it. There are a number of major commercial applications available for it, even some games, and bits and pieces of all sorts that you can scrounge up online. Beyond that, just dig through it, experience it. It's a weird piece of software.
The first thing you'll need to be able to do is to actually get software into the VM.
CD images are the most obvious route, since OS/2 natively understands those, any large commercial software package you find online has a good chance of being in ISO format, and you can make ISOs trivially from files on your computer with any CD burning app.
Floppy images are also an option but there are no good free manipulation programs. If you find software online that's already in IMG/IMA format that's one thing, but if you want to make your own floppy images it's tough to do except from inside a VM, which is a chicken-and-egg problem.
FTP could work to move files between a local server - there are several very simple and free FTP servers out there you can set up, and there's an FTP client built into OS/2, I think from 2.x up.
A web browser is probably the most convenient option if you can work it. Any site that's plain HTTP can be accessed with the basic browser included with several versions of OS/2, and certainly with Netscape, which you can get here and move into your VM via an ISO, as described above.
You can also run a local HTTP server, such as Miniweb - just put files to transfer in htdocs and (supposing your computer's real IP is 192.168.1.100) access them at http://192.168.1.100:8000/
Accessing HTTPS sites is a problem. Any browser released before the late 2000s - which covers everything ever officially released for OS/2 - will not access any modern website. I'm told there is a Firefox 45 build for this OS but I still don't know if that fixes the HTTPS issue.
I have limited experience with running OS/2 software at all, but here is what I've learned so far:
There are a number of substantial OS/2 hobby and resource sites where you can find software, as well as drivers etc. to make OS/2 work on real hardware.
Hobbes always deserves mention. It's kind of a bulk file repository for basically everything imaginable for OS/2, but it's just files with very little context or organization, and you won't be able to load it inside of OS/2 itself without signficant effort because as far as I can tell it's HTTPS-only.
eCSoft is another popular resource, but unlike Hobbes they don't seem to host much themselves, just link to other sites, so you may find broken links. They do however have plenty of info and screenshots on each program and
Internet Archive doesn't have a lot of easily located OS/2 software, but my recollection is that a lot of DOS/Windows software CDs from the 90s had OS/2 directories. So there's that.
OHFOWG is a compilation of OS/2 Warp games. I have not been through it at all thoroughly but you can check it out; I'll advise you that it's 1.8GB, but Warp 4.5 (at least) will read a DVD happily, so I extracted it, dumped it into a DVD ISO, and mounted it successfully.
If this was interesting to you, or if you did something interesting with it, email me:
If you like my work, consider tossing me a few bucks. It takes a lot of effort and payment helps me stay motivated.